The video below demonstrates the steps for installing Visual Studio with the appropriate environment. You can pause or slow down the playback if needed. Please note, the video does not include audio. 
The next video demonstrates how to create a LibTRF example from scratch. Detailed instructions with screenshots is provided below the video. You can pause or slow down the playback if needed. Please note, the video does not include audio. 
1. Create Project
Create an Empty C++ Project in Visual Studio.

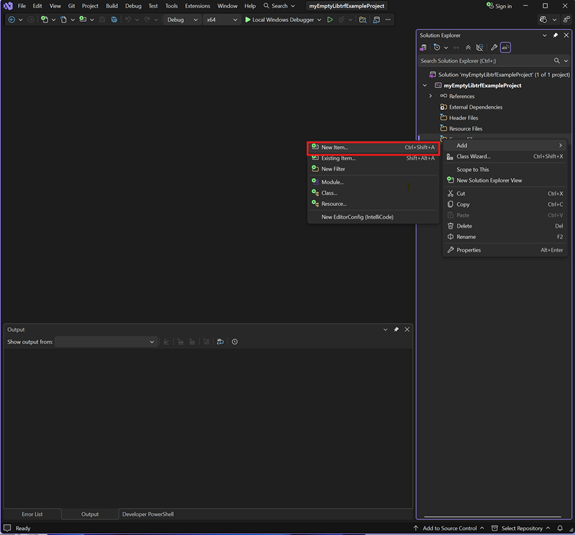
2. Add main.cpp
Right-click the sources file, and add a new item to create main.cpp
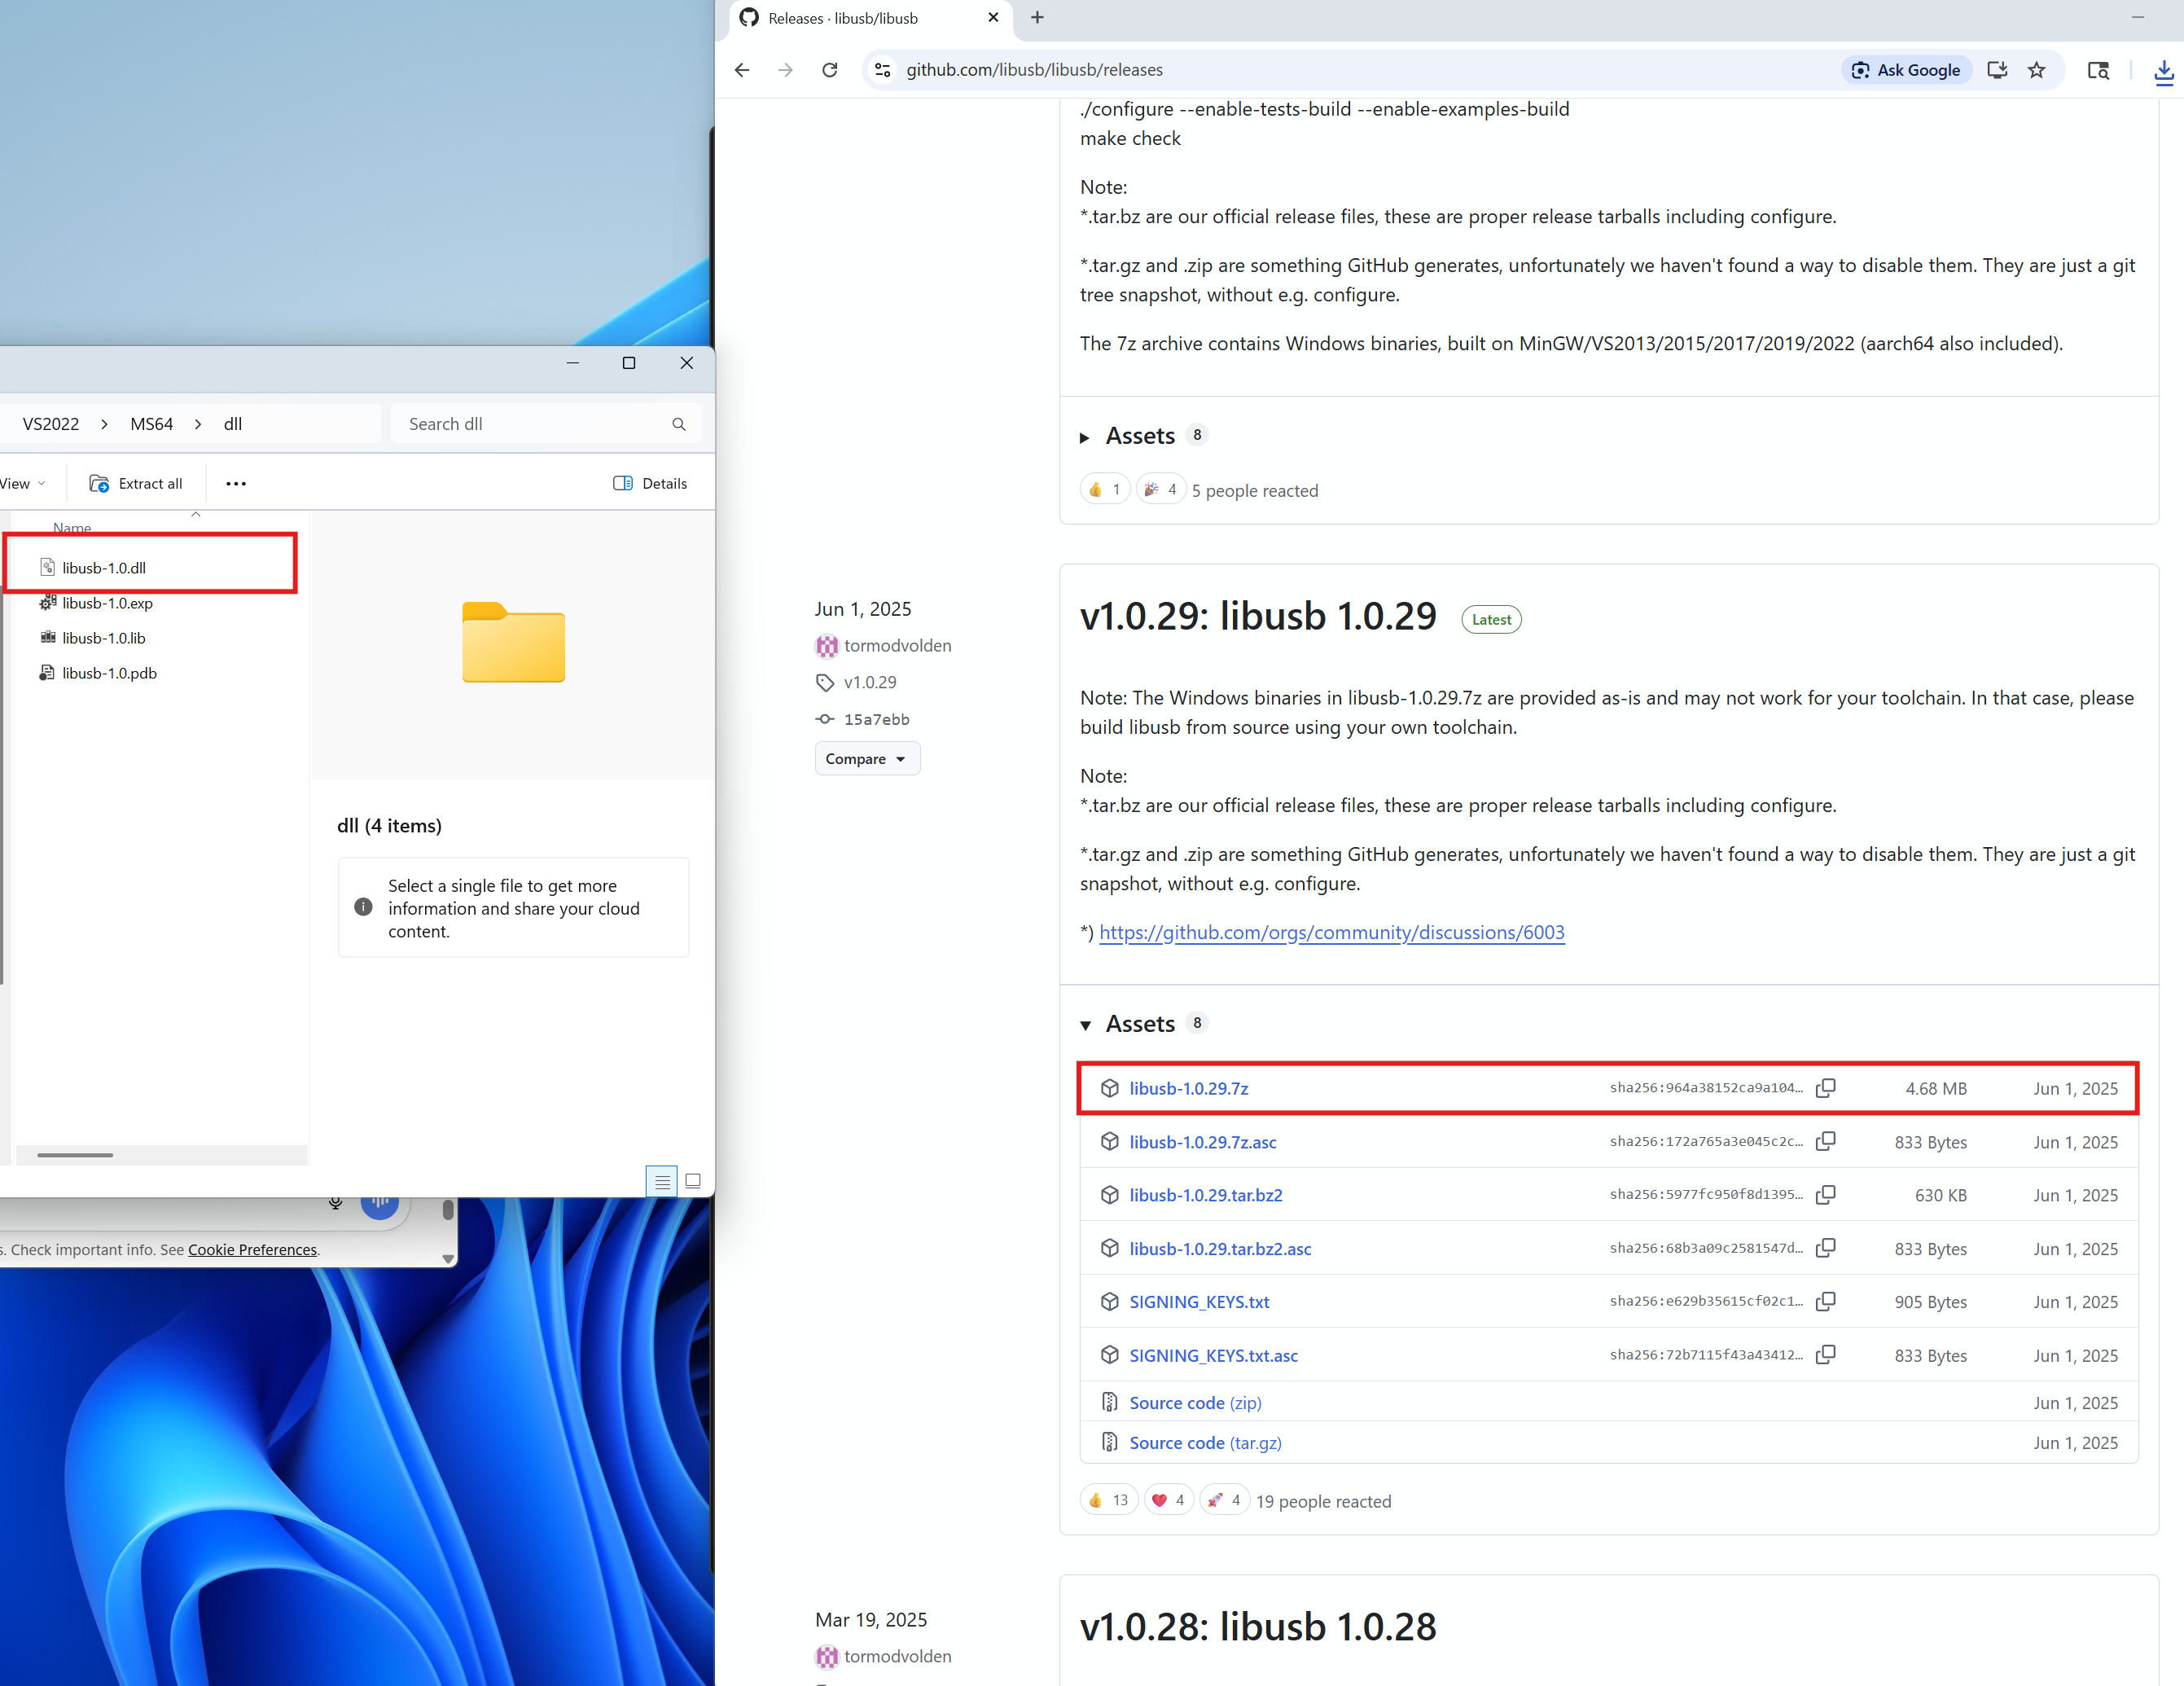
3. Folder Structure
Create a folder structure to store the libtrf files, for example:
C:\libs\libtrf\
libtrf.h
libtrf.lib
libtrf.dll
libusb-1.0.dll

4. Configure Project Properties
Project → Properties
Properties → C/C++ → General → Additional Include Directories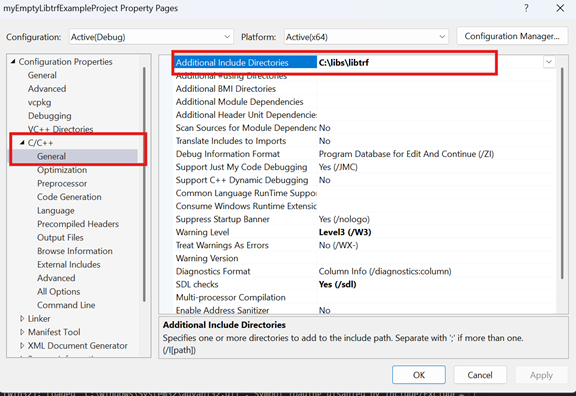
Properties → Linker → General → Additional Library Directories

Properties → Linker → Input → Additional Dependencies

5. Post-Build DLL Copy
Properties → Build Events → Post-Build Event
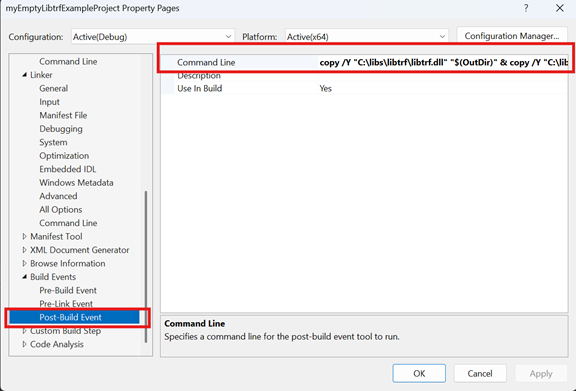
In the command Line argument, add the following:
copy /Y "C:\libs\libtrf\libtrf.dll" "$(OutDir)" & copy /Y "C:\libs\libtrf\libusb-1.0.dll" "$(OutDir)" & exit 0
6. Update main.cpp with an example
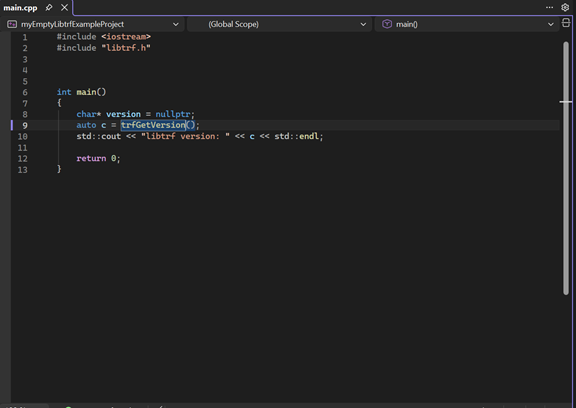
7. Update main.cpp with the example, then build and run the application

Result: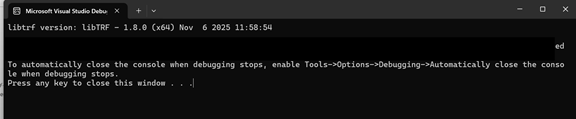
8. Additional Information
If you change the configuration from Debug to Release must reconfigure properties or switch to All Configurations in properties when applying the settings

libusb dll can be found here: